|
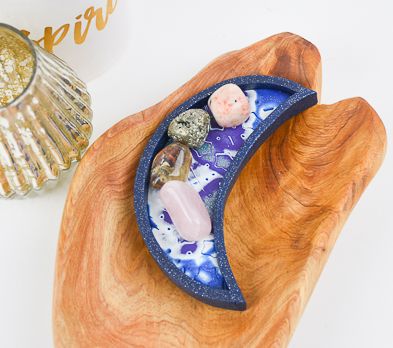
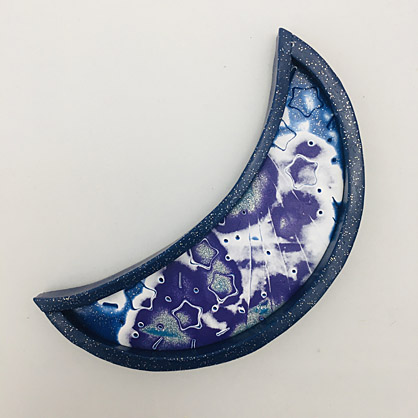
Stars are patterned into this Mokume Gane technique to create a
celestial crescent. I love incorporating different surface styles of clays
together when I make a Mokume Gane slab. Combining both Premo™ and Souffle™ is
the perfect way to create a lot of depth to the surface.
Supplies
Polymer Clay
Clay Machine and Clay Oven
Mini Geometric Cutters
Acrylic Brayer
Clay Blades
Duel end tools
STEP 1
Getting Started:
Please make sure your work area is covered and
you are not working on an unprotected surface. We recommend working on the
Sculpey® Oven-Safe Work Mat, wax paper, metal baking sheet, or disposable foil.
Uncured clay may damage unprotected furniture or finished surfaces. Be sure to
cover your crafting area appropriately.
Start with clean hands, unwrap and knead clay
until soft and smooth, or condition by running clay though a Pasta Machine. We
recommend using a designated machine for clay purposes only. When working with
multiple colors, clean hands with soap and water or baby wipes (we have found
that baby wipes work best) before switching colors. Shape clay, pressing pieces
firmly together. Wash hands after use.
Baking:
Begin by preheating oven to 275 °F (130 °C).
After you are done creating; for best results bake clay on an oven-proof
surface such metal, aluminum foil, an index card or the Sculpey® Clay Mat at
275°F (130 °C) for 30 minutes per 1/4" (6 mm) thickness according to
package directions. Oven safe glass or ceramic surfaces are also acceptable for
baking; however please note that the baking times may take longer as the glass
or ceramic surfaces take longer to heat up. For best baking results, use an
oven thermometer. DO NOT USE MICROWAVE OVEN. DO NOT EXCEED THE ABOVE
TEMPERATURE OR RECOMMENDED BAKING TIME.
STEP 2
For the pattern inside the dish we are going
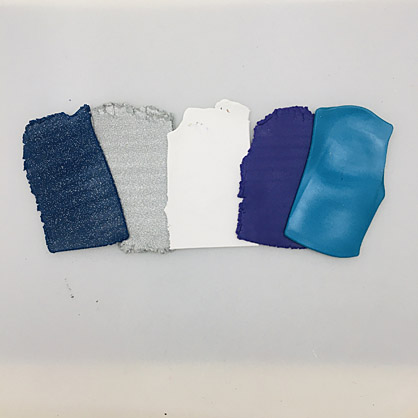
to make a Mokume Gane slab. Start by creating a sheet of each of the colors
using 1/4 bar of each one. Sheet these through the pasta machine on the
thickest setting. Try to keep the little sheets sort of rectangular in shape
and equal in dimension. It is okay if you have uneven or rough edges.
STEP 3
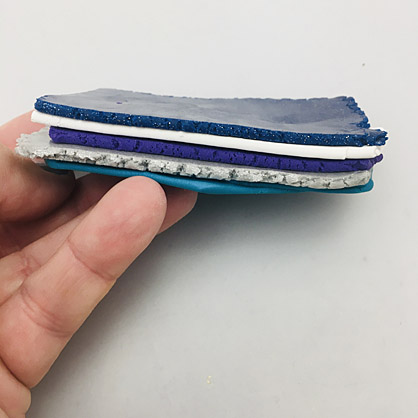
Pile the sheets up in this order from the
bottom up: Peacock Pearl, White Gold Glitter, Royalty, Igloo, and Galaxy
Glitter. I like to put one of the darkest colors on the top when I make a
Mokume Gane stack because that is the color that will carry the pattern through
the other colors.
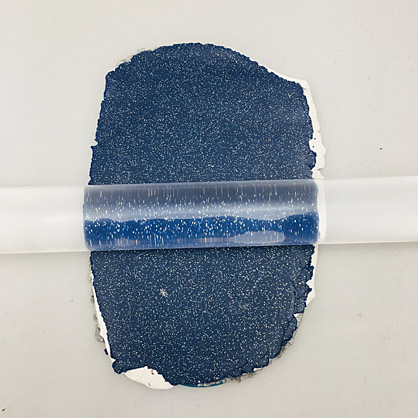
STEP 4
Roll over the stack of colors to flatten them
to twice the size.
STEP 5
Cut the stack in half with the Clay Blade and
stack one half on top of the other.
STEP 6
Roll over the stack again to flatten and to
increase to twice the size again.
STEP 7
Cut the sheet in half one more time and stack
one half on top of the other.
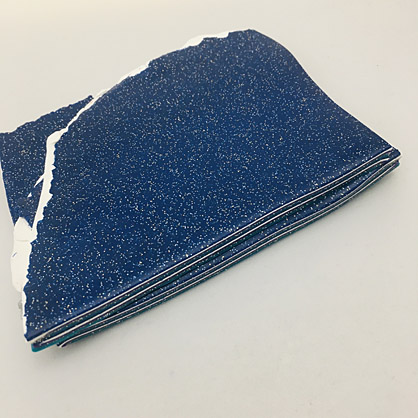
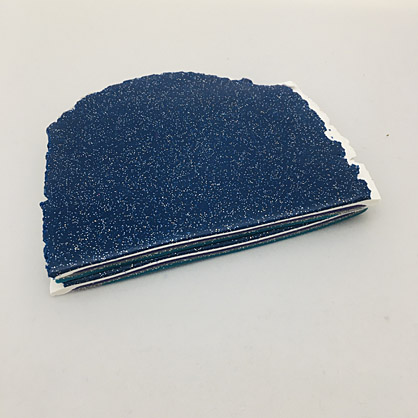
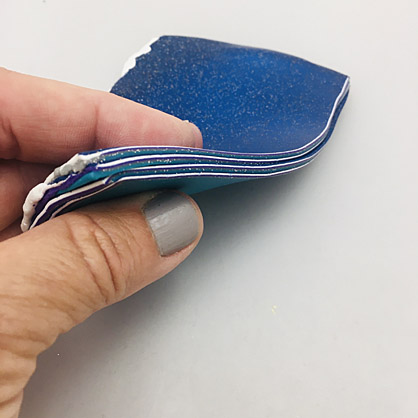
STEP 8
From the edge of the striped sheet you should
have four thin layers of each color. Make sure that you have a large enough slab
to make the size of crescent you would like. I kept my piece rectangular so
that I can get a crescent shape cut easily out of it.
STEP 9
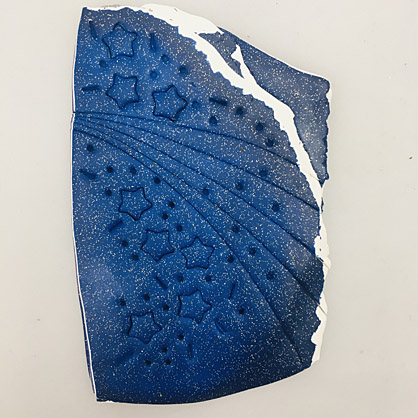
Now for the fun part! Use your cutters and
blades and tools to impress a pattern into the clay deeply. Start by using the
Flexible Blade, holding it curved between your hands, cut in curved lines
through the middle of the slab.
Then use the Mini Geometric star shaped cutter
to push stars in randomly.
Finally, use the 2 mm Ball Tool to press
little divots into the design.
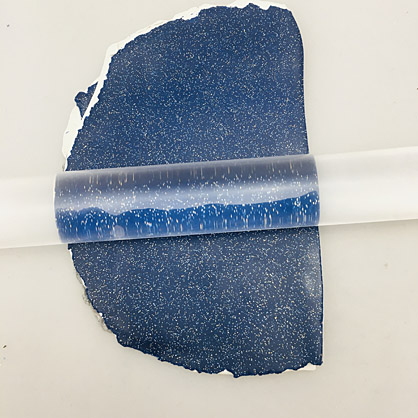
STEP 10
Roll over the design with the Acrylic Clay
Roller to “heal” the cuts. The design should mostly disappear but it’s okay if
some of it is still visible.
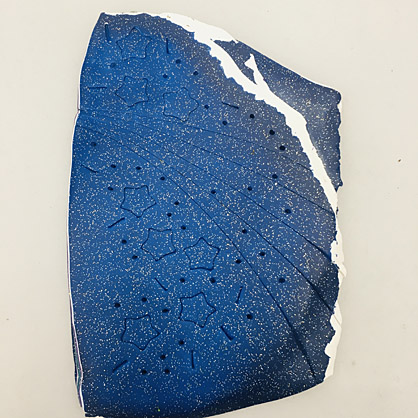
STEP 11
Use the Flexible Blade to shave away the top
layers of clay. The design will start to be apparent.
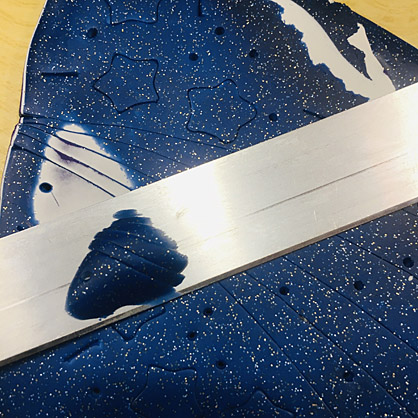
STEP 12
Keep shaving to remove thin slivers of clay.
The varying depths that you shave away will reveal more of the colors in deeper
areas and fewer colors in more shallow areas.

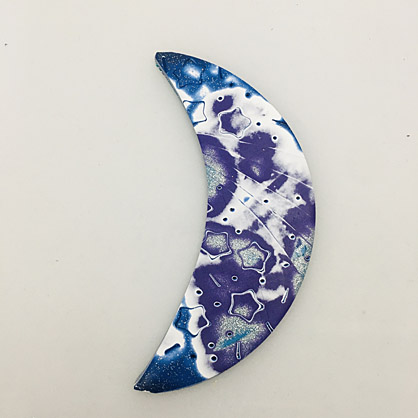
STEP 13
Keep shaving until you have revealed as much of
the pattern and as many colors as you like. You can set the shaved pieces aside
because they make great veneers for beads and other projects.
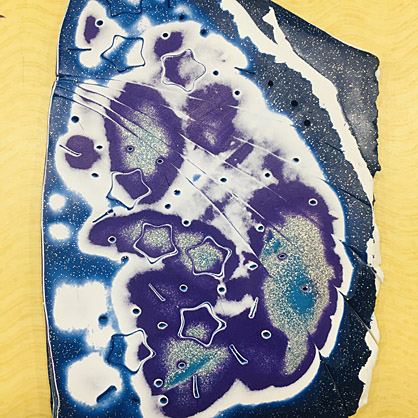
STEP 14
Use the 3” circle cutter to cut out the shape
of the crescent moon. Use the 4” circle cutter to cut the inner edge of the
crescent. Smooth the edges with your fingertips.
STEP 15
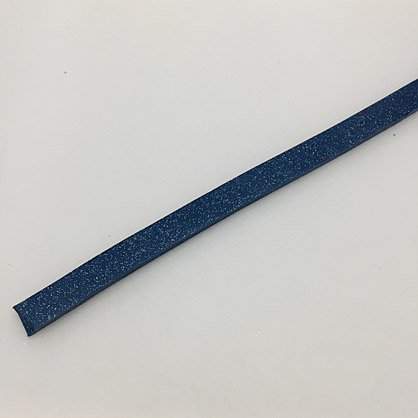
Sheet Galaxy Glitter through the pasta machine
on the thickest setting to create an even sheet. Make the sheet double thick by
folding it and rolling it smooth with the Acrylic Clay Roller. Cut out long
thin strips about 1/4”-3/8” wide. This will be the sides of the dish. If you
want a deeper dish, you can cut wider strips.
STEP 16
Border the crescent shape with the strips and
trim to fit.
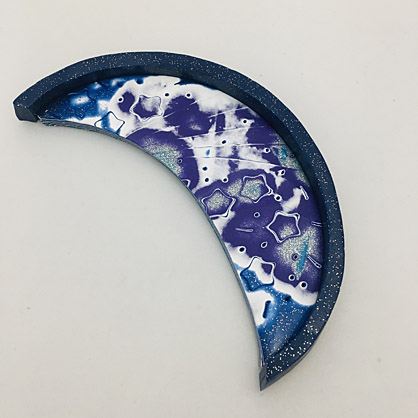
STEP 17
Border the inside curve as well and trim to
fit.
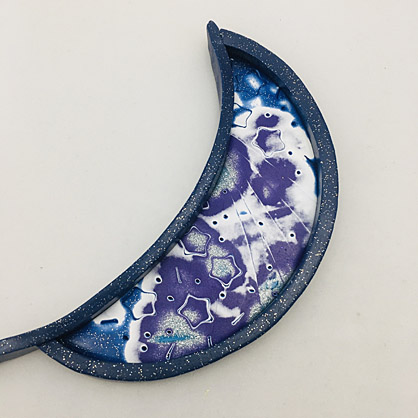
STEP 18
Smooth all the edges and seams with your
fingertips before baking. Bake following the baking instructions for Sculpey
Premo™ in Step 1 above. Allow to cool completely before handling.
|
