|
Purchase the supplies for this project from us! Find them here:
Premo 2oz Clays
Liquid Sculpey
Clay Machines and Ovens
Sculpey Molds & Other Silicone Molds
Sculpey Clay Blades
Sculpey 5 in 1 Tool
Sculpey Etch'n Pearl
Sculpey Duel-end Tool
Texture Sheets
STEP 1
Getting Started: Please make sure your work area is covered and you are not working on an unprotected surface. We recommend working on the Sculpey® Oven Safe Work Mat, wax paper, metal baking sheet, or disposable foil. Uncured Liquid Polymer Clay may damage unprotected furniture or finished surfaces. Be sure to cover your crafting area appropriately. - Stir Liquid Sculpey® completely. Thin with Sculpey® Liquid Clay Softener as needed - Wash hands after use (we have found that baby wipes work best)
Baking:
•It is important to use oven thermometer when you bake the liquids so that you can ensure your oven is at the correct temperature.•Do not microwave the liquids. They must be baked in a Preheated oven at 275 ºF (130 ºC) for liquid colors and 300 ºF (149 ºC) for Clear – Do not exceed baking temperatures.•If your piece is less than 1/4” bake for 15 minutes. For thicker pieces that are 1/4” or above bake for 30 minutes. •If your liquid project has become yellowed or discolored in the oven, when you remake it, tent it by placing either – folding an index card in half and placing your project under it or by using aluminum foil over your project.
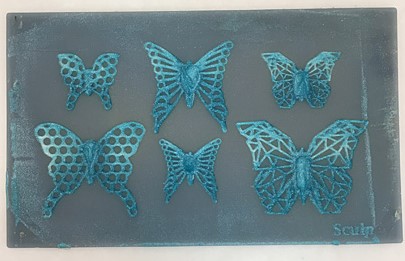
STEP 2 Fill the tips of the butterfly wings with Pearl Liquid Sculpey® (LS). Fill the bottoms of the wings and the bodies with Peacock Pearl LS.

STEP 3 Use the squeegee to push the liquids into all the details allowing the colors to mix slightly. Squeegee off excess. Bake the butterfly mold following the baking instructions for LS.
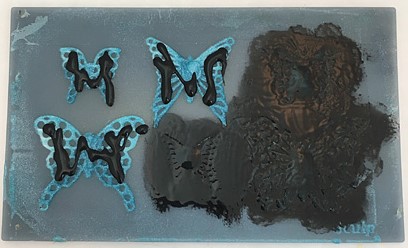
STEP 4 Allow the mold to cool completely but don’t release the butterflies. Squirt Black LS on the backs of each butterfly while they are still in the mold. Use your fingertip to spread the Black evenly over the backs. Don’t worry about neat edges right now.
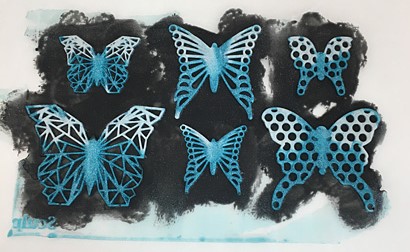
STEP 5 Bake the mold again following the baking instructions for LS. When the mold is completely cool gently flex it to remove the pieces. Trim around each butterfly with sharp scissors leaving a tiny border of Black around each. Set the butterflies aside for now.
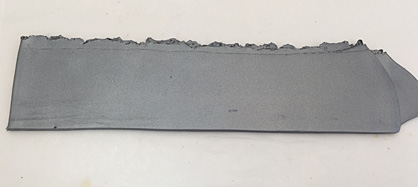
STEP 6 Sheet Silver Premo through the clay conditioning machine on the thickest setting. Reduce the setting to the second thickest and sheet again. We need a double thickness of this setting that is long enough to wrap around the cutter shape.
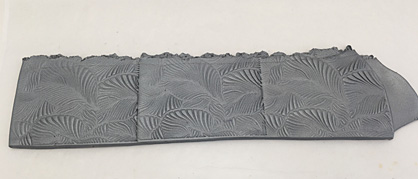
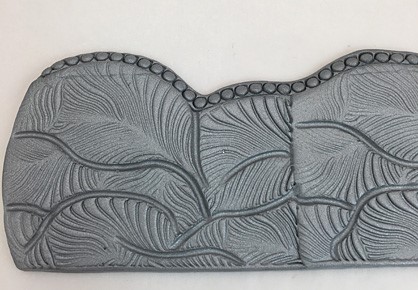
STEP 7 Texture the clay as deeply as possible with the texture sheet. The texture I’m using is repeatable so I’m lining it us as best as I can and texturing the length three times to make a continuous pattern.
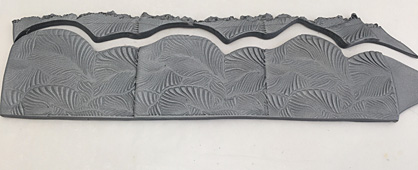
STEP 8 Trim along the top edge with the knife attachment in the 5-in-1 Clay Tool to make a nice rolling edge. Trim the bottom edge straight with the Super Slicer.
STEP 9 Smooth the top and bottom edges with your fingertips to remove the cut look. Flex the Super Slicer and trim the short ends to a nice curved shape. Smooth these edges as well. Exaggerate some of the lines in the texture pattern with the 2mm Ball Tool.
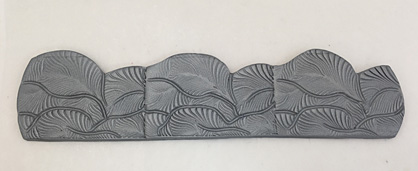
STEP 10 Roll a rope of Silver Premo that is as thick as the clay sheet. Apply the rope to the top rolling edge.

STEP 11 Texture the rope edge with divots using the Small Etch ‘n Pearl.
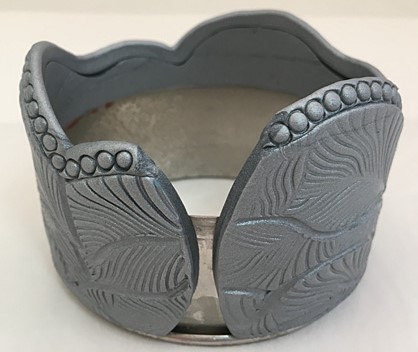
STEP 12 Bend the clay around the cutter shape to make the form of a cuff bracelet. Leave a small gap at the back. You can trim the clay as needed or stretch it slightly to achieve this gap.
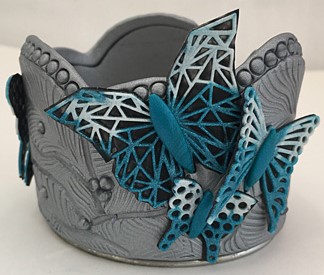
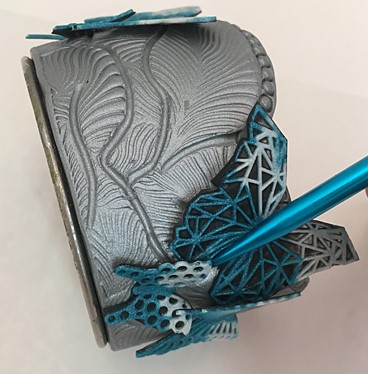
STEP 13 Next press the butterflies into place using a knitting needle. The knitting needle allows you to just place pressure on the body area as you push the butterfly into the base clay. Then the wings will lift slightly giving them a more flighty appearance. Position the butterflies so they overlap slightly and look free style.
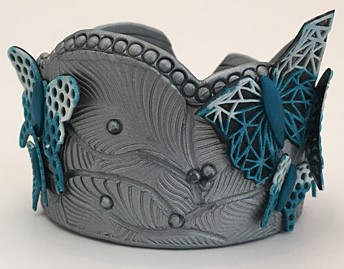
STEP 14 Add little pearls with the small Etch ‘n Pearl tool in Silver Premo. Add body shapes in Peacock Pearl Premo. Pinch a ridge along the body as you push it into place.
STEP 15
Bake the bracelet on the form following the baking instructions for Premo. Make sure your oven temperature is reset to 275F for Premo. Allow the bracelet to cool completely. Then gently flex the bracelet off of the cutter by squeezing the cutter gently.
|
