|
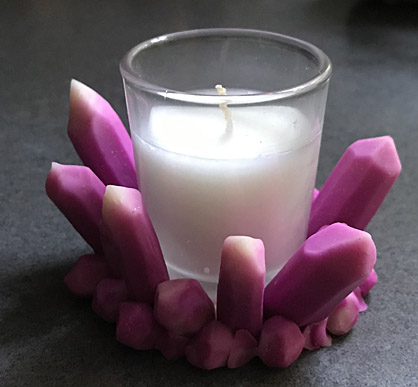
Create a glittering and dramatic addition to
your table with this faux crystal candle holder!
TIME TO COMPLETION: 60 minutes
Supplies:
Sculpey Clay starter Tools
Liquid Sculpey
NOTE: All the crystal shapes for this
project are made using the Skinner Blend technique. Please refer to the tutorial
on our website for directions on how to make the Skinner Blend.
STEP 1
Getting Started:
Please make sure your work area is covered and
you are not working on an unprotected surface. We recommend working on the
Sculpey® Oven-Safe Work Mat, wax paper, metal baking sheet, or disposable foil.
Uncured clay may damage unprotected furniture or finished surfaces. Be sure to
cover your crafting area appropriately.
Start with clean hands, unwrap and knead clay
until soft and smooth, or condition by running clay though a Pasta Machine. We
recommend using a designated machine for clay purposes only. When working with
multiple colors, clean hands with soap and water or baby wipes (we have found
that baby wipes work best) before switching colors. Shape clay, pressing pieces
firmly together. Wash hands after use.
Baking:
Begin by preheating oven to 275 °F (130 °C).
After you are done creating; for best results bake clay on an oven-proof
surface such metal, aluminum foil, an index card or the Sculpey® Clay Mat at
275°F (130 °C) for 30 minutes per 1/4" (6 mm) thickness according to
package directions. Oven safe glass or ceramic surfaces are also acceptable for
baking; however please note that the baking times may take longer as the glass
or ceramic surfaces take longer to heat up. For best baking results, use an
oven thermometer. DO NOT USE MICROWAVE OVEN. DO NOT EXCEED THE ABOVE
TEMPERATURE OR RECOMMENDED BAKING TIME.
STEP 2
Condition 1/2 block of clay.
Run it through the clay machine on the #1 setting. Cut out a 2” circle from
this sheet of clay. Repeat this process using Translucent clay.
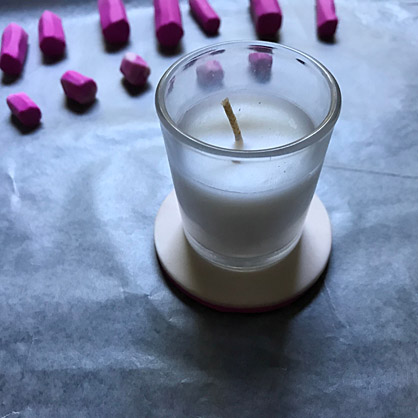
Stack the Translucent circle on top of the other circle. Place votive candle in the center of the circle. You
will be building your crystal shapes around the candle on this base.
STEP 3
You will be making approximately 15 to 20
crystal shapes of varying sizes. 10 will be on the larger side approximately 1
to 2 inches and the other 10 will be smaller approximately .5 to .75” in size.
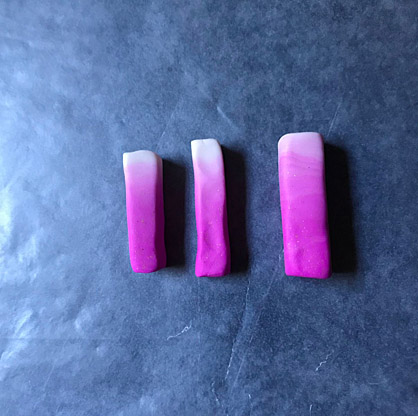
Create the Skinner Blend using the Your choice of clay colors. Once the blend is made roll the sheet into a
cylinder shape and roll lightly. Press this cylinder into a 4-sided shape now.
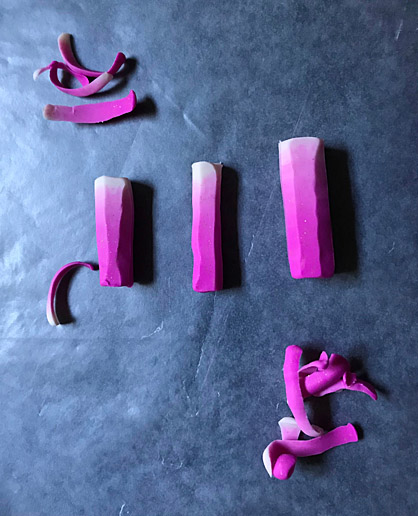
STEP 4
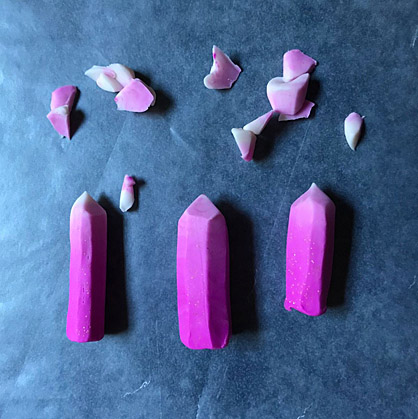
Use your clay blade and cut the square edges
away about 1/8” in. Cut pieces away from the more Translucent end to create the
crystal points. Set aside your crystal shape on some waxed paper and repeat
this process until you have all your crystal shapes complete.
STEP 5
Roll together the remaining remnants of clay
and make 10 to 15 tiny crystal shapes for fillers.
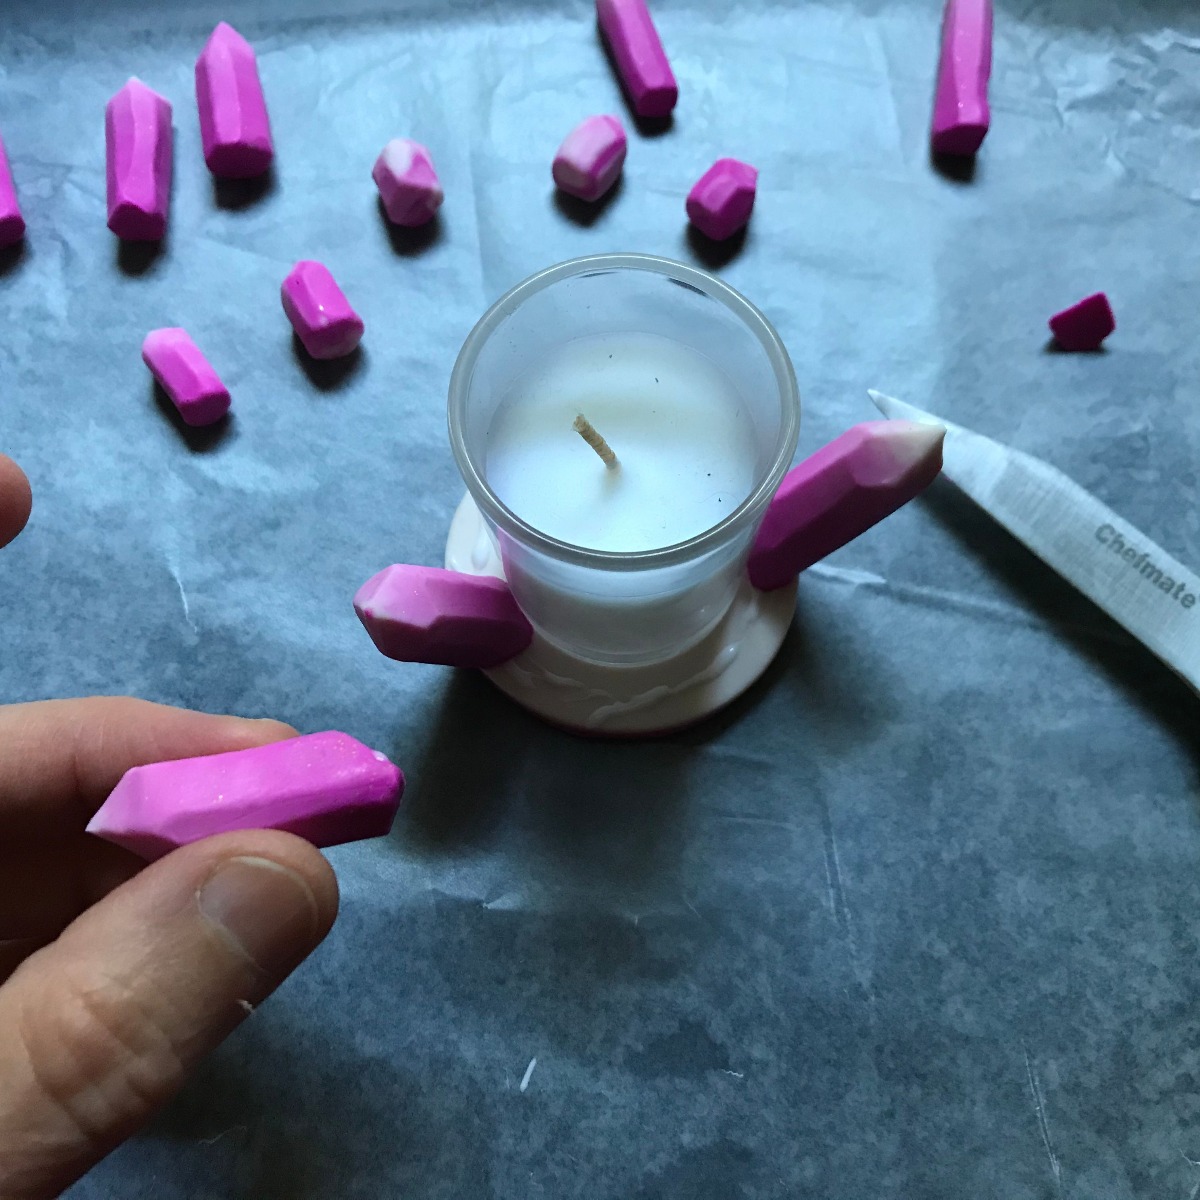
STEP 6
Start attaching your crystals around the
votive.
Start with the larger ones first pressing them
on at an angle. Use a drop of Liquid Sculpey to help attach. You may have to
trim the bottoms to get them to fit on the base how you want them.
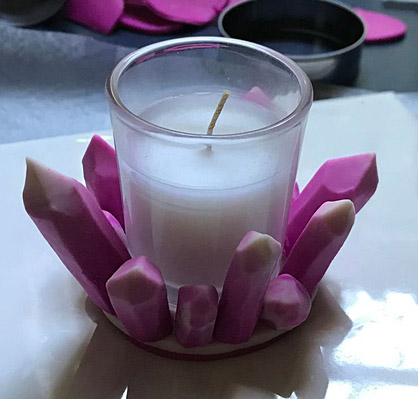
STEP 7
Once the larger crystals are on add the
smaller crystals. Use your little extra crystals to fill in the bottom and any
gaps around the votive.
STEP 8
Remove the candle votive. Bake according to
package directions. Allow to cool completely. Place votive back in place.
Enjoy!
|
